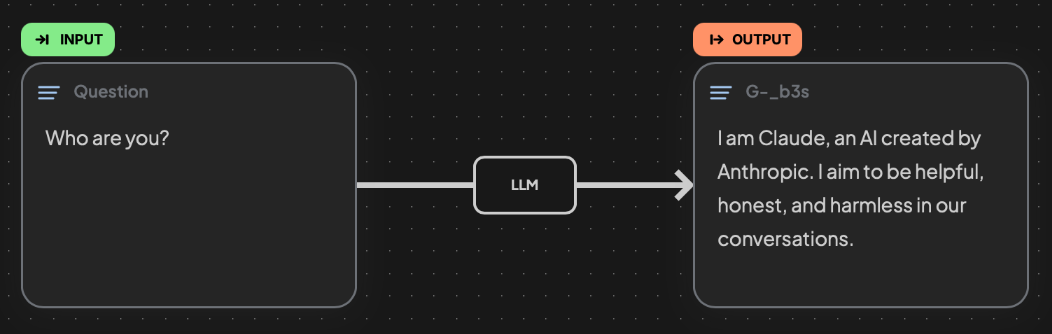
Case 1: A Simple Single-Step Workflow
🟡 Demo:
1. Click the + button in the top-left corner of the workspace to create a text block.

- Click
...to rename the block. (e.g., “Question”) - Add the question you want to send to the large language model in the Text area. (e.g., “Who are you?”)
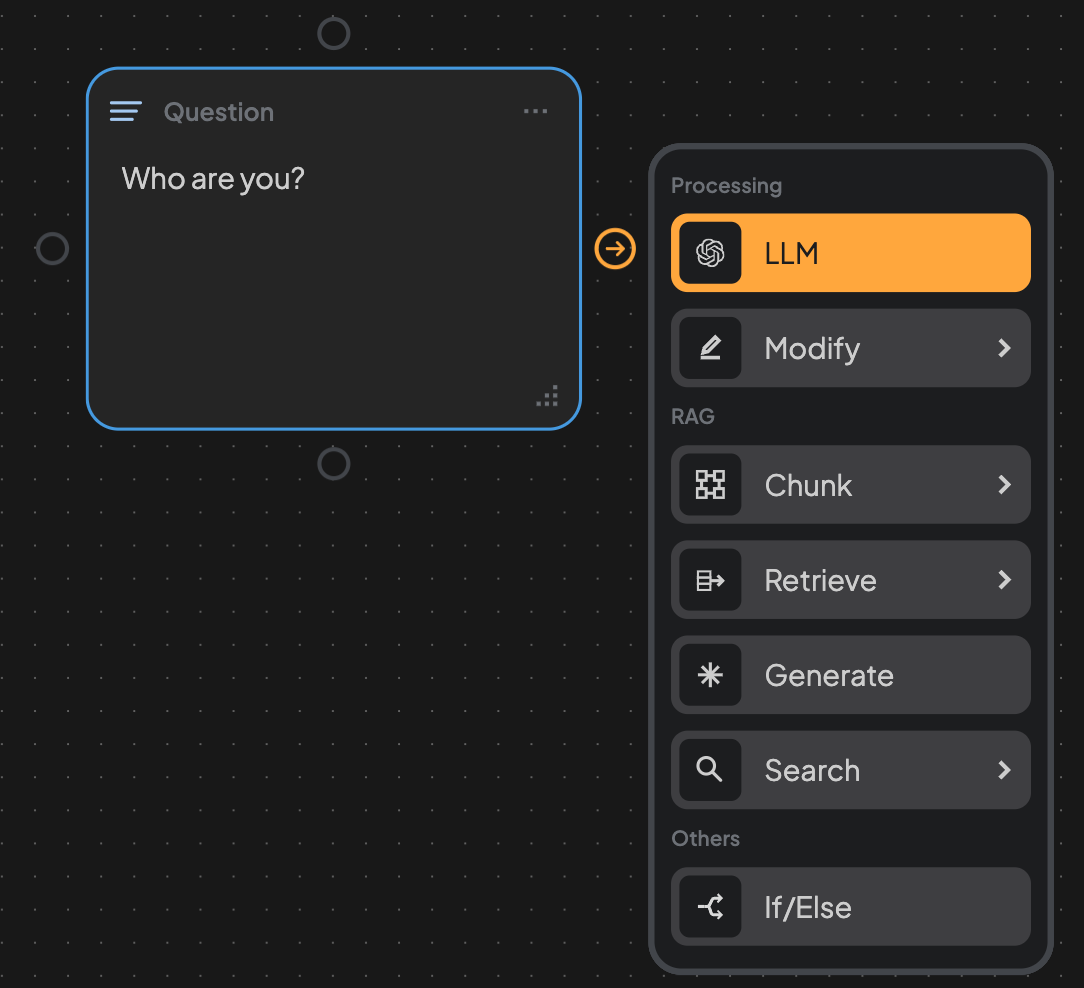
2. Create an LLM edge.
3. In the LLM edge block, you can see the name (e.g., “Question”) of the previous block inside the Input container.
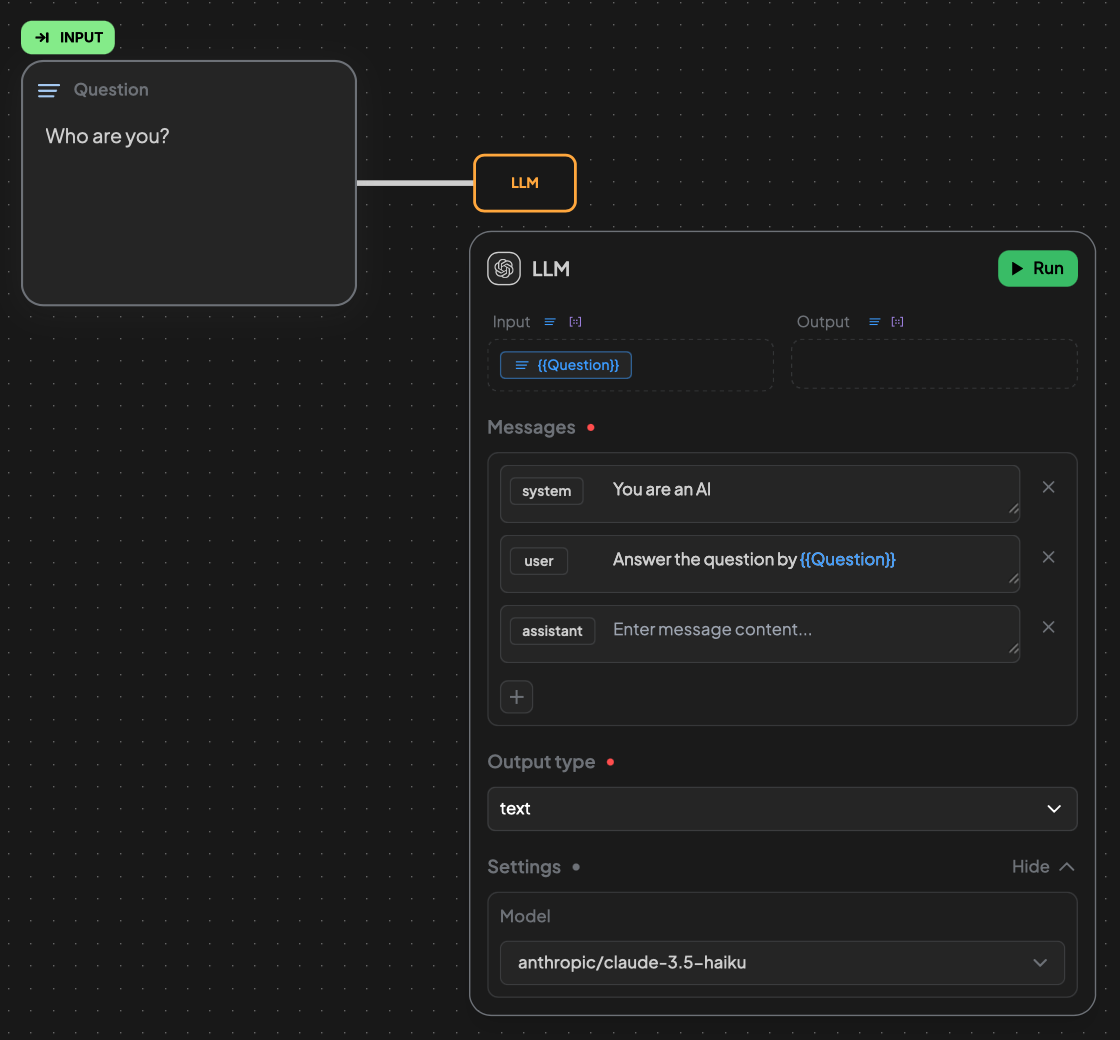
- If you don’t rename the block, it will be assigned a random name automatically.
- You can write your prompt in Messages container.
- If you want to add more messages with different roles, click the
+. - If you want to simply change the role, click
systemoruserorassistantin front of your message.system: used to set the context, tone, or role of the assistant before the conversation starts.user: represents the input from the user, such as a question or instruction.assistant: represents the response generated by the AI assistant.
- If you want to add more messages with different roles, click the
- If you want to use the input content: Click the name (in input container) twice → See
Copied!→ Paste in your Messages container - The Output type is set to Text by default. You can choose to enable Structured Output to let the LLM return content in a JSON object.
- You can change Models or add Base URL in Settings.
4. Click Run and you will see the result generated in a new block.